How to Make Herb Butter That Transforms Any Simple Meal Into Something Special

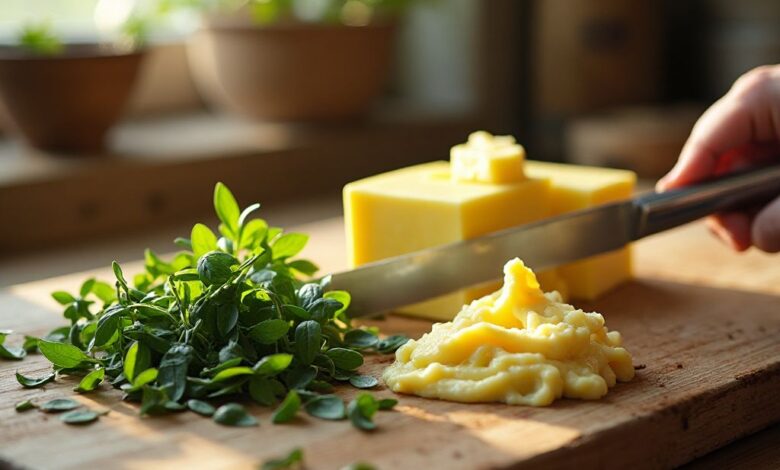
How to Make Herb Butter That Transforms Any Simple Meal Into Something Special
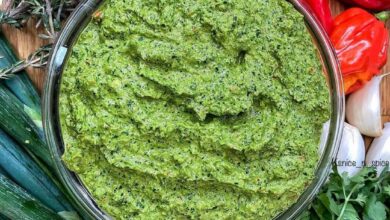
Imagine this: a humble piece of crusty bread, still warm from the oven, awaiting its destiny. Now, instead of plain, cold butter, envision a swirl of emerald green, fragrant with the very essence of a sun-drenched garden, melting slowly, releasing an intoxicating perfume of fresh parsley, chives, and a whisper of garlic. One bite, and suddenly, you’re not just eating bread; you’re experiencing a moment of pure culinary delight, a simple pleasure elevated to an art form. This, my friends, is the magic of herb butter, a secret weapon in the kitchens of chefs and home cooks alike, capable of transforming the mundane into the magnificent with astonishing ease.
The Timeless Art of Beurre Composé
The concept of infusing butter with flavor is far from new. For centuries, across cultures and cuisines, cooks have understood the power of fat as a flavor carrier. In French culinary tradition, it’s known as beurre composé, or compound butter—a sophisticated yet remarkably simple preparation that has graced tables from rustic farmhouses to Michelin-starred restaurants. Its origins are intertwined with the desire to preserve fresh herbs and add nuanced flavor to dishes without complex sauces.
From the robust garlic and herb butter melting over a perfectly grilled steak in a Parisian bistro, to the delicate lemon-dill butter gracing freshly caught salmon along the Mediterranean coast, herb butter speaks a universal language of flavor. It’s a testament to the enduring appeal of natural ingredients and the ingenuity of cooks who sought to maximize taste with minimal fuss. Today, in our fast-paced world, herb butter continues to matter profoundly. It offers a shortcut to gourmet flavor, a way to infuse everyday meals with freshness, aroma, and a touch of homemade luxury, connecting us to a culinary heritage that values both simplicity and exquisite taste.
Crafting Your Own Culinary Masterpiece: Herb Butter Essentials
Creating your own herb butter is an incredibly rewarding experience, offering endless possibilities for customization. Let’s dive into the core elements that make this simple preparation so extraordinary.
Flavor Profiles: A Symphony of Greens
The beauty of herb butter lies in the diverse flavor profiles you can achieve. Each herb brings its unique character to the party:
- Parsley (Italian Flat-Leaf): Bright, fresh, and slightly peppery. A universal crowd-pleaser.
- Chives: Mild oniony zest, delicate and vibrant. Perfect for adding a subtle pungency.
- Dill: Anise-like, fresh, and slightly tangy. A natural partner for seafood.
- Rosemary: Piney, pungent, and woody. Best for heartier meats and roasted vegetables.
- Thyme: Earthy, minty, and slightly floral. Versatile and comforting.
- Sage: Musky, savory, and aromatic. A classic with poultry and pork.
- Cilantro: Bright, citrusy, and a little peppery. Fantastic for global-inspired dishes.
- Basil: Sweet, peppery, and aromatic. A taste of summer, wonderful with tomatoes.
Best Food Pairings: Elevate Every Bite
Once you’ve mastered the art of making herb butter, you’ll find yourself reaching for it constantly. Here are just a few ideas:
- Steak & Grilled Meats: Garlic-parsley-chive butter, rosemary-thyme butter.
- Roasted Vegetables: Thyme-garlic butter, sage butter (especially with squash).
- Fish & Seafood: Lemon-dill butter, tarragon butter.
- Chicken & Poultry: Sage-thyme butter, lemon-rosemary butter.
- Pasta & Grains: Melted herb butter with fresh Parmesan.
- Bread & Toast: Any herb butter is a winner here.
- Corn on the Cob: Cilantro-lime butter, classic garlic-parsley butter.
- Baked Potatoes: A dollop of chive butter is divine.
Cooking Techniques: Integrating Herb Butter
Herb butter isn’t just for spreading. It’s a versatile cooking ingredient:
- Finishing Touch: Place a pat on hot steaks, fish, or vegetables just before serving to melt and create an instant sauce.
- Sautéing: Use it to sauté mushrooms, shrimp, or chicken for an immediate flavor boost.
- Roasting: Rub it under the skin of a chicken or turkey before roasting, or toss with root vegetables.
- Baking: Spread on focaccia dough before baking, or incorporate into savory scones.
Step-by-Step Recipe: The Classic Garlic & Herb Butter
This is your foundational recipe. Feel free to experiment with different herb combinations once you’ve got this down!
Ingredients:
- 1 cup (2 sticks) unsalted butter, softened to room temperature
- 1/4 cup finely chopped fresh Italian flat-leaf parsley
- 2 tablespoons finely chopped fresh chives
- 2-3 cloves garlic, minced very fine (or grated)
- 1/2 teaspoon sea salt (or to taste)
- 1/4 teaspoon freshly ground black pepper
- Optional: A squeeze of fresh lemon juice or a pinch of lemon zest for brightness
Instructions:
- Soften the Butter: Ensure your butter is truly soft, but not melted. It should give easily when pressed. Leave it on the counter for an hour or two.
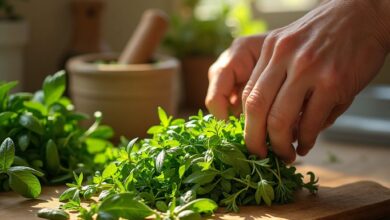
- Prepare the Herbs: Wash and thoroughly dry your fresh herbs. Finely chop the parsley and chives. Mince or grate the garlic. The finer you chop, the more evenly the flavor will be distributed.
- Combine Ingredients: In a medium bowl, combine the softened butter, chopped parsley, chives, minced garlic, sea salt, black pepper, and any optional lemon juice/zest.
- Mix Thoroughly: Using a fork or a rubber spatula, vigorously mix all the ingredients together until they are well combined and the herbs are evenly distributed throughout the butter. You want to make sure every spoonful has a burst of flavor.
- Shape and Chill:
- Option A (Log Form): Spoon the herb butter onto a piece of parchment paper or plastic wrap. Roll it into a log shape, about 1.5 to 2 inches in diameter. Twist the ends to seal tightly.
- Option B (Container): Press the herb butter into a small airtight container.
- Refrigerate: Place the log or container in the refrigerator for at least 2 hours, or until firm. This allows the flavors to meld beautifully.
Storage Tips: Keeping Your Butter Fresh
Homemade herb butter is a joy to have on hand. Properly stored, it will last:
- Refrigerator: Up to 2 weeks in an airtight container or tightly wrapped log.
- Freezer: Up to 3-6 months. The log method is fantastic for freezing, as you can simply slice off a medallion as needed. Wrap logs in an additional layer of foil or place slices in a freezer-safe bag.
Substitution Options: When Fresh Isn’t Available
While fresh herbs are always preferred for their vibrant flavor and aroma, you can absolutely make delicious herb butter with dried herbs in a pinch. Remember that dried herbs are more concentrated, so use about one-third the amount of fresh herbs. For instance, if a recipe calls for 3 tablespoons of fresh parsley, use 1 tablespoon of dried parsley.
- For high-quality dried herbs and spices, I often turn to trusted brands like Mountain Rose Herbs, Frontier Co-op, or Simply Organic. Their commitment to organic and ethically sourced ingredients ensures you’re getting the best flavor even when fresh isn’t an option.
Expert Insider Tips for Unforgettable Herb Butter
After a decade of playing in the kitchen with herbs, I’ve gathered a few secrets that elevate herb butter from good to absolutely sublime:
- The Butter Matters: Start with good quality, unsalted butter. European-style butters often have a higher fat content and richer flavor, which makes a noticeable difference. Unsalted butter allows you to control the seasoning precisely.
- Finely Mince, Don’t Process: While a food processor might seem like a shortcut, it can bruise delicate herbs and release too much moisture, leading to a less vibrant color and potentially watery butter. Hand-chopping ensures clean cuts and better texture.
- Layer Your Aromatics: Don’t stop at just herbs! A tiny bit of finely minced shallot, a touch of lemon zest, a pinch of chili flakes, or even a whisper of smoked paprika can add incredible depth and complexity. Think beyond the green.
- The Power of Salt & Rest: Use a good quality sea salt (like flaky Maldon) and don’t be shy. Salt brings out the flavors of the herbs. And always, *always* let your herb butter chill for at least a few hours, or even overnight. This resting period allows the flavors to truly meld and deepen, transforming individual notes into a harmonious symphony.
- Grow Your Own: For the freshest, most potent herbs, there’s nothing like snipping them right from your garden. Even a small pot on a windowsill can provide a steady supply of chives, parsley, or basil. Brands like Burpee Seeds offer fantastic starter kits and a wide variety of herb seeds to get you going.
Health and Wellness Benefits: Flavor with a Conscience
Beyond the sheer delight of taste, incorporating fresh herbs into your butter offers a subtle yet significant boost to your wellness. Herbs are nutritional powerhouses, packed with:
- Antioxidants: Many herbs, like parsley and thyme, are rich in antioxidants that help combat oxidative stress in the body.
- Vitamins and Minerals: Fresh herbs provide a surprising array of vitamins (like Vitamin K in parsley) and minerals, adding micronutrients to your diet.
- Anti-inflammatory Compounds: Several herbs contain compounds known for their anti-inflammatory properties, contributing to overall health.
- Flavor without Excess: By infusing butter with robust herbal flavors, you can often reduce the need for excessive salt or other unhealthy seasonings, making your meals more flavorful and potentially healthier.
While herb butter is still butter (and should be enjoyed in moderation), it’s a wonderful way to naturally enhance the nutritional profile and flavor complexity of your cooking.
Common Mistakes to Avoid
Even seasoned cooks can stumble. Here are a few pitfalls to steer clear of when making your herb butter:
- Cold Butter: Trying to mix cold, hard butter with herbs is a recipe for frustration and uneven distribution. Always let your butter soften naturally to room temperature.
- Wet Herbs: Moisture is the enemy of fresh herbs. After washing, ensure your herbs are thoroughly dry before chopping. Excess water can lead to a less vibrant butter and shorten its shelf life.
- Too Much Stem: While some tender herb stems (like parsley) are fine when finely chopped, woody stems from rosemary or thyme should be removed. They add an unpleasant texture and bitterness.
- Under-Seasoning: Don’t forget the salt and pepper! Butter, especially unsalted, needs proper seasoning to make the herb flavors pop. Taste and adjust.
- Not Chilling Enough: Patience is a virtue. Skipping the chilling step means your butter won’t be firm enough to slice neatly, and the flavors won’t have had time to fully marry.
Safety and Precautions
Herb butter is generally very safe for consumption. However, a few common-sense precautions apply:
- Freshness is Key: Always use fresh, clean herbs. If you’re foraging, be absolutely certain of your plant identification.
- Allergies: If you have known allergies to specific herbs, obviously avoid using them.
- Moderation: While delicious and nutritious, remember it is still butter. Enjoy it as part of a balanced diet.
- Garlic Safety: When making garlic-infused butter, ensure you refrigerate it promptly and keep it chilled. While rare, improperly stored raw garlic in oil (or butter) can create an anaerobic environment where botulism bacteria can thrive. Sticking to refrigeration and consuming within the recommended timeframe mitigates this risk.
Unleash Your Inner Chef Today!
There you have it, dear reader—the complete guide to crafting herb butter that promises to elevate every meal it touches. From the verdant freshness of parsley to