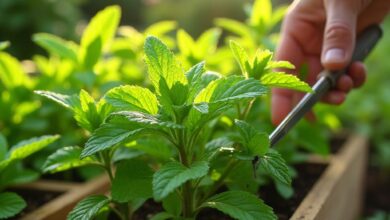
How to Build a Raised Herb Bed in Your Garden Over a Single Weekend


Build Your Own Herb Haven: A Raised Bed Garden in One Weekend!
Imagine this: You step out your back door, the morning sun warm on your face, and the air alive with the intoxicating perfume of fresh basil, rosemary, and thyme. With a simple snip, you gather vibrant, verdant leaves to transform your breakfast omelet or infuse your evening tea. This isn’t a scene from a glossy magazine; it’s the delicious reality of having your own raised herb bed, a dream you can cultivate and complete in just a single weekend.
The Elevated Advantage: Why Raised Beds Are Herb Heaven
For centuries, gardeners have sought ways to optimize their growing spaces, and the raised bed stands as a testament to ingenuity and efficiency. While the exact origins are debated, ancient civilizations from the Incas with their terraced farming to medieval European monasteries utilizing walled garden plots understood the power of an elevated growing space. Today, this age-old wisdom translates into a modern marvel for the home gardener, especially when it comes to herbs.
Why does a raised bed make such a difference for your aromatic allies? First, it grants you unparalleled control over soil quality. Herbs, like all plants, thrive in specific conditions, and a raised bed allows you to create the perfect custom blend of well-draining, nutrient-rich soil that they adore. No more battling compacted clay or sandy patches! Secondly, raised beds warm up faster in spring, extending your growing season and giving those tender annuals a head start. They also offer superior drainage, which is crucial for many Mediterranean herbs that despise “wet feet.” Beyond the botanical benefits, they elevate your garden to a comfortable working height, reducing back strain and making weeding and harvesting a joy rather than a chore. Plus, they act as a natural barrier against some common garden pests and even playful pets, keeping your precious herbs safe and sound. It’s a dedicated, beautiful space where your herbs can truly flourish, making them more accessible and a delight to interact with daily.
Your Weekend Project: Building a Raised Herb Bed
Ready to transform your garden? Here’s your step-by-step guide to building a beautiful, functional raised herb bed over a single glorious weekend.
1. Planning Your Herb Haven: The Blueprint for Success
-
Location, Location, Location: Most culinary herbs crave sunshine – at least 6-8 hours of direct sunlight daily. Scout your garden for the sunniest spot. Consider proximity to your kitchen for easy harvesting and a water source for convenient watering. A level spot is ideal, but minor slopes can be accommodated.
-
Size Matters: A common and manageable size for a raised bed is 4 feet wide by 8 feet long (1.2m x 2.4m). This width allows you to reach the center from either side without stepping into the bed, preventing soil compaction. The height should be at least 10-12 inches (25-30 cm) for most herbs, but 18-24 inches (45-60 cm) is even better for deeper root development and reduced bending.
-
Choosing Your Materials: Durability and safety are key.
- Untreated Cedar or Redwood: These woods are naturally rot-resistant and beautiful, lasting for many years without harmful chemical leaching.
- Composite Decking: A low-maintenance, long-lasting option made from recycled plastics and wood fibers.
- Stone, Brick, or Concrete Blocks: A more permanent, sturdy, and aesthetically pleasing option, though often requiring more labor and cost.
- Avoid Treated Lumber: Older pressure-treated lumber often contains chemicals that can leach into your soil. If using new treated lumber, ensure it’s rated for “ground contact” and ideally use a food-safe liner, though untreated wood is always preferred for edibles.
2. Gathering Your Tools & Materials: What You’ll Need
-
Lumber: For a 4x8x12-inch bed, you’ll need two 8-foot (2.4m) and two 4-foot (1.2m) lengths of 2×6 or 2×8 lumber (doubling these for an 18-inch height). Multiply as needed for larger or taller beds.
-
Fasteners: 3-inch deck screws (rust-resistant) or galvanized nails.
-
Tools: Measuring tape, pencil, saw (circular saw or miter saw recommended for straight cuts), drill/driver, level, square, shovel, rake, wheelbarrow.
-
Lining Material (Optional but Recommended): Heavy-duty landscape fabric or cardboard to suppress weeds from below.
-
Soil: This is crucial! You’ll need a significant amount of high-quality raised bed mix. Estimate cubic feet needed (length x width x height). For example, a 4x8x1ft bed needs 32 cubic feet. Consider a blend of good organic topsoil, compost, and perhaps some perlite or vermiculite for drainage. Look for brands like Miracle-Gro Organic Choice Raised Bed Soil or source from a local nursery.
-
Herb Plants/Seeds: Your chosen green treasures! Burpee Seeds offers a fantastic variety of herb seeds and starter plants.
3. The Weekend Build: Step-by-Step Construction
-
Day 1: Frame Construction & Placement
- Prepare the Site: Clear the chosen area of any weeds, grass, or debris. Level the ground as much as possible with a shovel and rake.
- Cut the Lumber: If your lumber isn’t pre-cut, measure and cut your boards to the desired lengths. For a 4×8 bed, you’ll have two 8-foot pieces and two 4-foot pieces for each layer of height.
- Assemble the First Layer: Lay out your first layer of boards in a rectangle. Use a square to ensure corners are at 90 degrees. Predrill pilot holes to prevent wood splitting, then secure the corners with your deck screws (two per corner).
- Add Subsequent Layers (if taller): Stack additional layers of lumber on top of the first, staggering the joints for added strength (like bricklaying). Secure each layer to the one below it at the corners and along the sides (every 2-3 feet) with screws.
- Level and Square: Once the frame is assembled, use your level to ensure the top edges are perfectly horizontal. If not, you can slightly dig out or add soil under the frame until it’s level. Double-check that the frame is square by measuring diagonals – they should be equal.
- Line the Bed (Optional): If desired, line the bottom of the bed with heavy-duty landscape fabric or cardboard. This helps suppress weeds while still allowing water drainage. You can also skip this if you prefer direct contact with the ground.
-
Day 2: Filling, Planting & Watering
- The “Lasagna” Method for Soil: For deeper beds, consider layering organic materials. Start with a layer of cardboard (weed barrier), then add twigs, leaves, straw, and unfinished compost. This “hugelkulter” style decomposition enriches the soil over time. Finish with your premium raised bed soil mix. For shallower beds, simply fill with your chosen soil blend. Aim for about 2-3 inches below the top edge of the bed to prevent soil from washing out.
- Choosing Your Herbs:
- Sun Lovers: Basil, Rosemary, Thyme, Oregano, Sage, Lavender, Marjoram.
- Partial Shade Tolerant: Parsley, Cilantro, Mint (though mint is best contained!), Chives.
- Perennials vs. Annuals: Group perennials (rosemary, thyme, oregano, chives) together, as they’ll return each year. Plant annuals (basil, cilantro, dill, parsley) where you can easily rotate them.
- Mind the Mint: Mint is notoriously vigorous. Plant it in its own pot *within* the raised bed to prevent it from taking over the entire space.
- Planting Your Green Treasures: Gently remove plants from their nursery pots. Loosen any circling roots. Dig a hole slightly larger than the root ball, place the plant, and backfill with soil, gently patting down. Space plants according to their mature size; overcrowding leads to poor air circulation and disease. For seeds, follow package instructions for depth and spacing.
- Watering In: After planting, give your entire bed a thorough, gentle watering. This settles the soil around the roots and helps eliminate air pockets.
4. Ongoing Care for a Bountiful Harvest
-
Watering: Raised beds drain faster than in-ground gardens, so monitor soil moisture closely. Water deeply when the top inch or two of soil feels dry. Drip irrigation or soaker hoses can be incredibly efficient.
-
Feeding: While your initial soil is rich, herbs benefit from occasional feeding. A diluted liquid organic fertilizer like a fish emulsion or compost tea (e.g., from Frontier Co-op or Mountain Rose Herbs for sourcing ingredients) can be applied every 4-6 weeks during the growing season.
-
Harvesting: Regular harvesting encourages bushier growth! For most herbs, snip off the top few inches of growth, just above a leaf node. Don’t take more than a third of the plant at once.
-
Pest Control: Healthy plants are less susceptible to pests. Inspect your herbs regularly. Hand-picking visible pests, using insecticidal soap, or introducing beneficial insects are all natural approaches. Companion planting, like marigolds, can also deter pests.
Expert Insider Tips for Your Herb Oasis
-
The “Edge Effect” Advantage: Plant your most frequently harvested herbs (like basil, parsley, cilantro) along the edges of your raised bed for easy access. This also encourages you to harvest regularly, which promotes more growth.
-
Succession Planting for Continuous Harvests: For annual herbs like basil, cilantro, and dill, sow small batches of seeds every 2-3 weeks. This ensures a constant supply of fresh, tender leaves throughout the season, rather than one massive harvest followed by bolting plants.
-
Vertical