How to Build a Self-Watering Herb Planter That Practically Looks After Itself

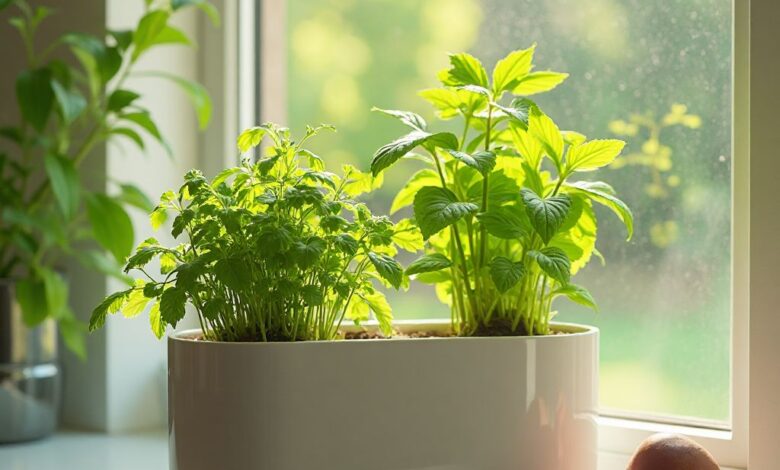
Have you ever reached for a sprig of fresh basil, only to find your once-vibrant plant drooping, its leaves crisped by forgetfulness? Or perhaps you’ve dreamed of a kitchen overflowing with fragrant rosemary, pungent thyme, and bright mint, but the thought of daily watering schedules feels like another chore on an already overflowing plate? Imagine a world where your herbs practically water themselves, thriving with lush greenery and potent aromas, ready to elevate every meal. It’s not a gardener’s fantasy; it’s the magic of a self-watering herb planter, and it’s simpler to create than you might think.
The Everlasting Quest for Freshness: Why Self-Watering is a Game-Changer
For millennia, humans have cultivated herbs, recognizing their power to heal, flavor, and delight. From the ancient Egyptians using mint for embalming and stomach ailments, to Roman soldiers carrying thyme for courage, and medieval monasteries meticulously tending to their medicinal gardens, herbs have always been integral to human existence. Today, in our fast-paced world, the desire for fresh, homegrown produce remains strong, a yearning for connection to the earth and the pure, unadulterated taste of nature. However, modern life often leaves little room for the daily diligence required by traditional gardening. This is where the self-watering planter steps in, a brilliant blend of ancient wisdom and modern convenience, allowing us to enjoy the bounty of a vibrant herb garden without the constant worry of under or over-watering.
The concept of self-watering isn’t new; it’s rooted in the principles of capillary action, a natural phenomenon observed in everything from tree roots drawing water upwards to the way a paper towel soaks up a spill. Early forms of passive irrigation date back centuries, but modern self-watering planters harness this science in a contained, efficient system perfect for urban dwellers, busy professionals, and anyone who wants to simplify their gardening routine. It’s about creating a miniature ecosystem where your herbs dictate their hydration needs, drawing water as they please from a hidden reservoir. This not only ensures consistent moisture – a crucial factor for many thirsty herbs – but also minimizes water waste and extends the time between refills, making it an ideal solution for a truly low-maintenance, thriving herb patch.
How to Build a Self-Watering Herb Planter That Practically Looks After Itself
Building your own self-watering herb planter is a rewarding project that requires minimal tools and materials. The basic principle involves two containers: an outer reservoir for water and an inner planting container that sits within it, drawing water up through a wicking system. Let’s get started!
Why a Self-Watering Planter?
- Consistent Moisture: No more guesswork! Your herbs receive a steady supply of water, preventing the stress of drying out or the rot of overwatering.
- Less Frequent Watering: Depending on the size of your reservoir, you might only need to refill it once a week or even less, freeing up your time.
- Healthier Roots: The wicking system encourages roots to grow downwards towards the water source, developing a stronger, more robust root system.
- Vacation-Proof: Headed out of town? Your self-watering planter has you covered, keeping your herbs hydrated while you’re away.
- Water Efficiency: Less evaporation means less water waste, making it an eco-friendly choice.
Understanding the Wicking System
The magic happens through capillary action. A “wick” (usually a piece of rope or fabric) connects the soil in your planting container to the water in the reservoir below. As the soil dries, it pulls water up the wick, keeping the root zone consistently moist without waterlogging. It’s like a plant-powered drinking straw!
Materials You’ll Need
- Two Plastic Containers: One larger (the reservoir) and one slightly smaller (the planting container) that fits snugly inside the larger one, leaving a gap for water at the bottom. Think repurposed plastic food containers, buckets, or even decorative pots.
- Drill with a 1/4 to 1/2 inch bit: For drainage and wick holes.
- Wicking Material: Cotton rope, nylon rope, felt strips, or even old t-shirt strips work well. Choose a material that absorbs water effectively.
- Potting Mix: A good quality, well-draining potting mix. I often recommend brands like Miracle-Gro Potting Mix for its consistency and nutrient blend. Avoid heavy garden soil.
- Perlite or Vermiculite: Optional, but highly recommended for aeration and moisture retention.
- Your Chosen Herb Starts or Seeds: Consider Burpee Seeds for a wide variety of reliable herb options.
- Scissors or Knife: For cutting wicking material.
Step-by-Step Construction Guide
Step 1: Prepare the Reservoir Container
The larger container will hold your water. You don’t need to do much to this one, but if it’s opaque, consider drilling a small “overflow hole” near the top if it will be exposed to rain, to prevent the reservoir from overfilling. For indoor use, this isn’t strictly necessary, but it’s good practice for outdoor planters.
Step 2: Prepare the Planting Container
This is where your herbs will live.
- Drainage Holes: Drill several 1/4-inch holes in the bottom of this container. These are for initial top-watering and ensuring any excess water can drain if the wicking system ever gets overwhelmed.
- Wick Holes: Drill 2-4 larger holes (about 1/2 inch, depending on your wick size) through the bottom of the container. These are where your wicks will pass through. Space them evenly.
Step 3: Assemble the Wicking System
Cut your wicking material into lengths long enough to reach from the bottom of the planting container, through the wick holes, and down to the bottom of the reservoir container, with a little extra slack. Thread one end of each wick through the holes you drilled in the planting container, pulling about 2-3 inches of the wick into the container. The rest of the wick should hang down below.
Step 4: Create a “Wick Holder” (Optional but Recommended)
To ensure good contact between the wicks and the soil, you can place a small inverted cup or a piece of plastic mesh over the wicks at the bottom of the planting container. This creates a small chamber for water to collect and ensures the wicks stay in place and are surrounded by soil.
Step 5: Add Potting Mix
Mix your potting soil with perlite or vermiculite (about 3 parts soil to 1 part perlite/vermiculite) to improve drainage and aeration. Fill the planting container with this mix, gently packing it around the wicks. Make sure the wicks are well integrated into the soil column. Leave about an inch of space from the rim of the container.
Step 6: Plant Your Herbs
Gently remove your chosen herb starts from their nursery pots and plant them in your prepared self-watering container. If starting from seed, follow the seed packet instructions for depth and spacing. Firm the soil around the base of the plants.
Step 7: Water from the Top and Fill the Reservoir
Initially, water your herbs from the top as you would a regular potted plant. This helps settle the soil and ensures the wicks are saturated and begin working. Once the soil is thoroughly moist, fill the reservoir container with water. Make sure the wicks hanging from the planting container are submerged in the water. Place the planting container inside the reservoir container.
Choosing Your Herbs for Self-Watering Planters
While many herbs thrive in self-watering systems, some are better suited than others due to their moisture preferences.
- Thirsty & Happy: Basil, mint (especially vigorous in these systems!), parsley, cilantro, chives, lemon balm, and tarragon absolutely adore consistent moisture and will flourish.
- Moderate Moisture: Marjoram and oregano can do well, but ensure the wicking isn’t *too* aggressive, as they prefer slightly drier conditions than the “thirsties.”
- Exercise Caution: Rosemary, thyme, and lavender prefer drier, well-drained conditions. While it’s possible to grow them in a self-watering planter, you’ll need to be mindful not to let the reservoir stay full constantly, allowing for drier periods. Consider a separate, less constantly moist system for these Mediterranean beauties.
Ongoing Care for Your Self-Watering Planter
Even self-watering planters need a little love!
- Refill Reservoir: Check the water level in your reservoir every few days. Refill when it’s low.
- Occasional Top Watering: Every few weeks, give your herbs a top-watering. This helps flush out any accumulated salts and ensures the entire soil column gets refreshed.
- Feeding: Since nutrients can leach more quickly in a self-watering system, consider a diluted liquid organic fertilizer every 2-4 weeks, especially for heavy feeders like basil and mint.
- Sunlight: Place your planter in a location that meets your herbs’ sunlight requirements (most culinary herbs prefer 6+ hours of direct sun).
- Harvesting: Regular harvesting encourages bushier growth and prolongs the life of your herbs.
Expert Insider Tips
- Prevent Algae: If your reservoir is clear or exposed to light, algae can grow. Use an opaque outer container, or if clear, add a few drops of food-grade hydrogen peroxide (3%) to the water every refill to inhibit algae growth.
- Elevate for Airflow: If your planting container sits directly on the bottom of the reservoir, consider placing a few small stones or an inverted plastic lid under it to create a small air gap. This ensures the wicks have unobstructed access to water and promotes better aeration.
- Horticultural Charcoal: A thin layer of horticultural charcoal at the bottom of your reservoir can help keep the water fresh and prevent odors. Mountain Rose Herbs offers quality gardening amendments like this.
- Don’t Overfill Soil: When planting, leave about an inch of space from the rim of the planting container. This prevents soil from washing out during top-watering and allows for better air circulation around the plant base.
- Rotate Your Planter: To ensure even growth and prevent your herbs from leaning towards the light, rotate your planter 90 degrees every few days.
Health and Wellness Benefits
Beyond the sheer joy of fresh flavors, having a self-watering herb planter offers a bounty of wellness benefits. Fresh herbs are packed with vitamins, minerals, and antioxidants, boosting your immune system and supporting overall health. Think of the vibrant Vitamin K in parsley, the calming properties of lemon balm, or the digestive aid of mint. Cooking with fresh herbs encourages healthier eating habits, reducing the need for excess salt or unhealthy fats. Moreover, the act of gardening itself, even on a small scale, is a proven stress-reducer, fostering mindfulness and a deeper connection to nature. It’s a small act of self-care that yields delicious, healthful rewards.
Common Mistakes to Avoid
- Insufficient Wick Contact: Ensure your wicks are well embedded in the soil and fully submerged in the reservoir water. If not, the wicking action won’t work efficiently.
- Wrong Soil Type: Using heavy garden soil instead of a light, well-draining potting mix can compact and hinder root growth and wicking.
- Choosing